Small Kitchen Organization Ideas That Make Every Inch Work
Cooking in a small kitchen tests your patience every single day. Counter space disappears under appliances, drawers jam with loose tools, and one deep cabinet swallows half your pans. Most cooks blame the size of the room, when the real problem is that everything competes for the same few surfaces. By evening, the room feels smaller than it did at breakfast, and cooking starts to feel like hard work.
Good news is that small kitchens respond well to simple systems. Give every item one clear home, use the height of the room, and keep daily tools within easy reach, and the same space suddenly feels twice as workable. Nobody needs a remodel to cook comfortably in a compact room.
Inside this guide, you will find small kitchen organization ideas for drawers, cabinets, walls, and the tight corners most people ignore. Each idea comes with practical details, a note on who it suits best, one worked example, and one mistake worth avoiding. Pick two or three ideas, start this week, and let the calm spread.
What Is the Best Way to Organize a Small Kitchen?
Simple systems beat clever gadgets every time. Strong small kitchen organization ideas share three habits: daily items live near where you use them, vertical space does the heavy lifting, and every shelf holds one category only. Cooking feels calmer the moment you stop moving piles to reach the thing you need.
Picture a narrow galley kitchen after one weekend of sorting. Knives hang on a wall strip, spices sit in a tiered drawer insert, and dry goods stand in clear jars along one shelf. Breakfast takes minutes because coffee, mugs, and oats share one small zone beside the kettle. Nothing fancy happened in that room, just clear homes for everyday things.
Drawer Dividers That Keep Utensils in Rows
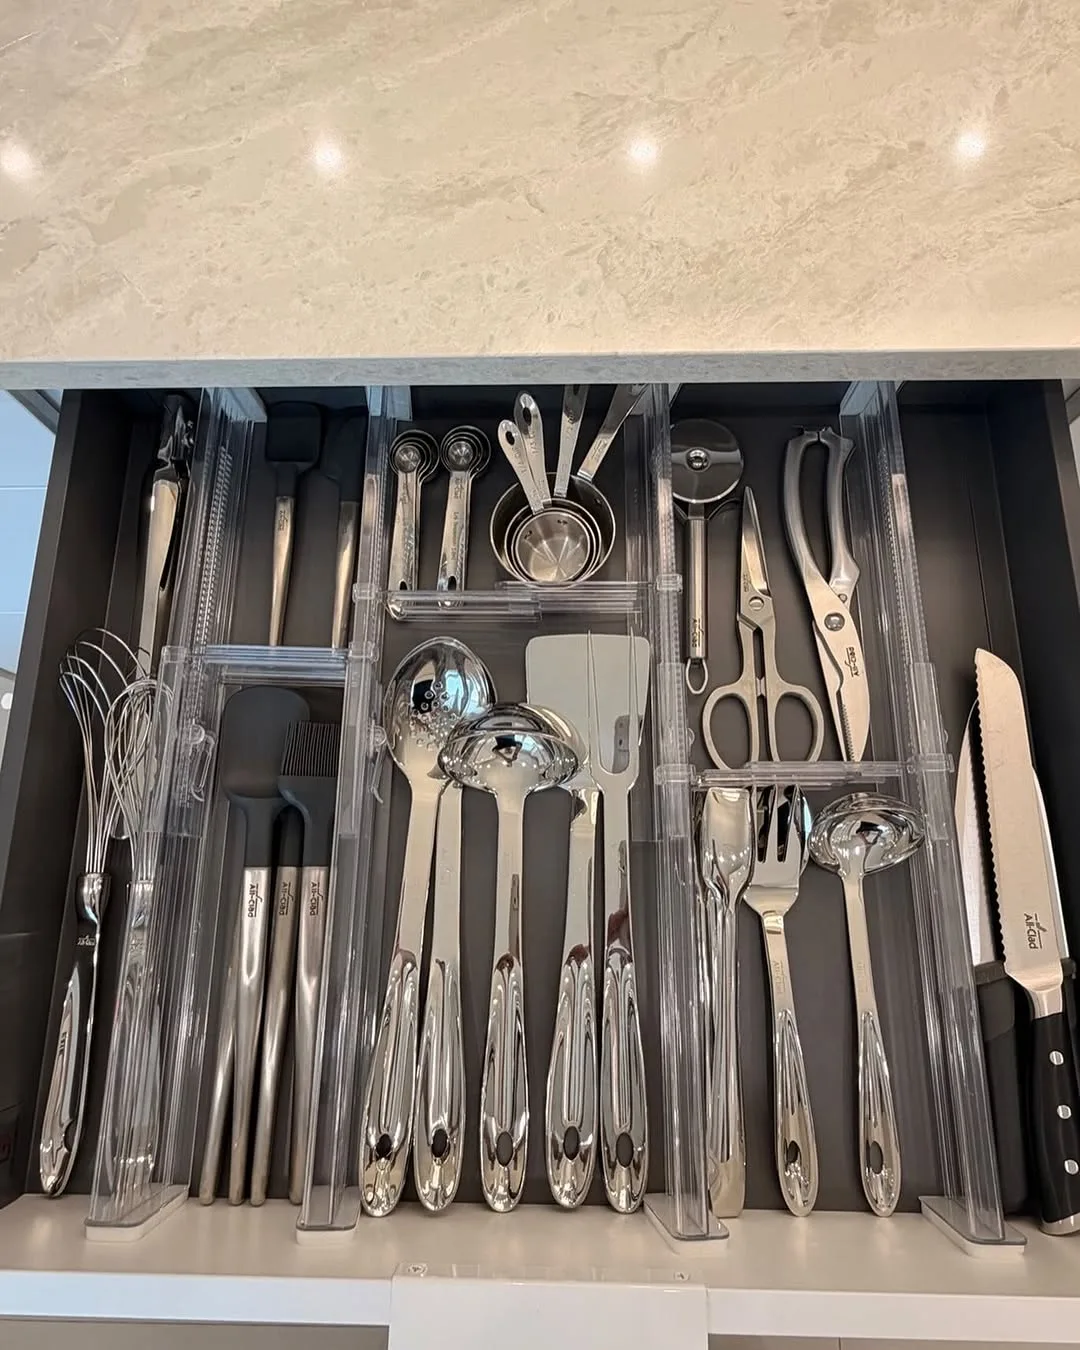
Loose utensils tangle into a knot in every small kitchen drawer. Dividers end the digging by giving forks, spoons, and tools fixed lanes, so you grab what you need without looking down. Cooking speeds up quietly when your hand learns exactly where each tool rests.
Measure the drawer before buying anything, then choose an adjustable tray or simple bamboo dividers that fit the true width. Keep daily tools in the front rows and push rarely used gadgets toward the back. One shallow second tray can stack inside deep drawers for whisks, peelers, and thermometers.
Busy home cooks and parents packing lunches every morning suit divided drawers best because seconds matter on rushed days. One mother sorted three messy drawers in under an hour and timed her morning routine the next day. She saved ten minutes simply because nothing hid under anything else.
Dividers fail when drawers hold more than the lanes can carry. Cramming spare tools on top of the tray brings back the tangle within a week. Keep one spare set in a box elsewhere, wash tools before they return to the drawer, and leave a little empty space in every lane.
Stackable Shelf Risers Inside Cabinets
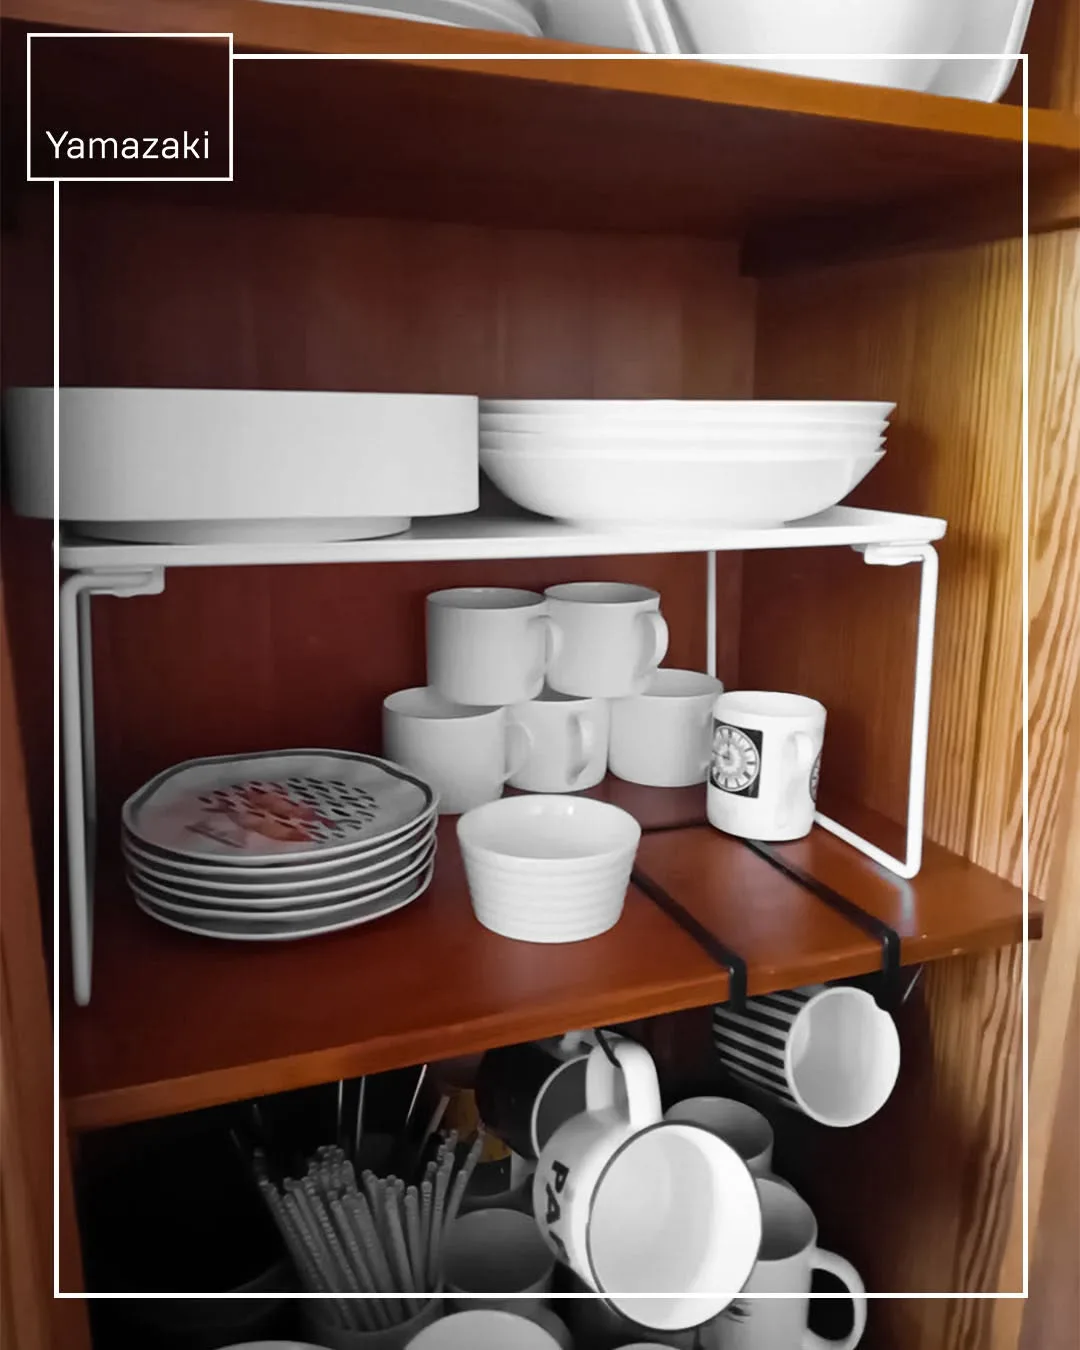
Cabinets waste the most space at the top, where a tall gap sits empty above short jars and cups. Shelf risers rank among the most useful small kitchen organization ideas because they split that gap into two working levels. Plates, bowls, and tins suddenly stack in calm layers instead of wobbling towers.
Choose sturdy metal or bamboo risers with legs tall enough for mugs to slide underneath. Place heavy items on the cabinet floor, lighter ones on the riser, and keep the front edge clear so labels stay visible. Measure shelf depth first, since deep cabinets need longer risers than shallow ones.
Small households with growing mug and bowl collections suit risers well because collections expand without warning. One couple added two risers to a single cabinet and freed a whole second shelf for baking dishes. Their counter stayed clear through the busy holiday cooking season that followed.
Stacking too high is the mistake that chips rims and slows you down. Every layer you add makes the bottom items harder to lift out safely. Keep stacks to two levels, leave grabbing room above each pile, and move rarely used pieces to a higher shelf instead.
Clear Jars for Dry Goods with Simple Labels
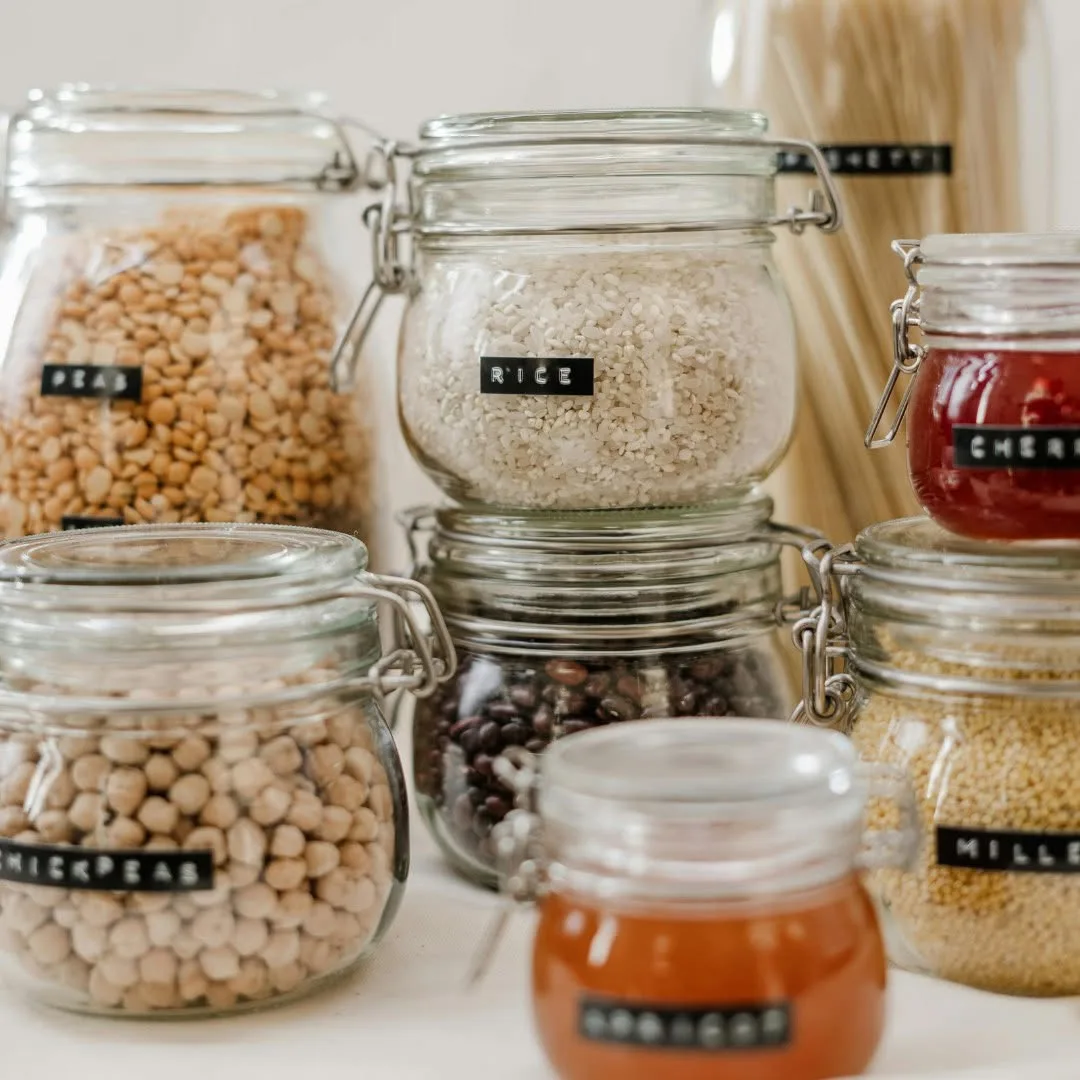
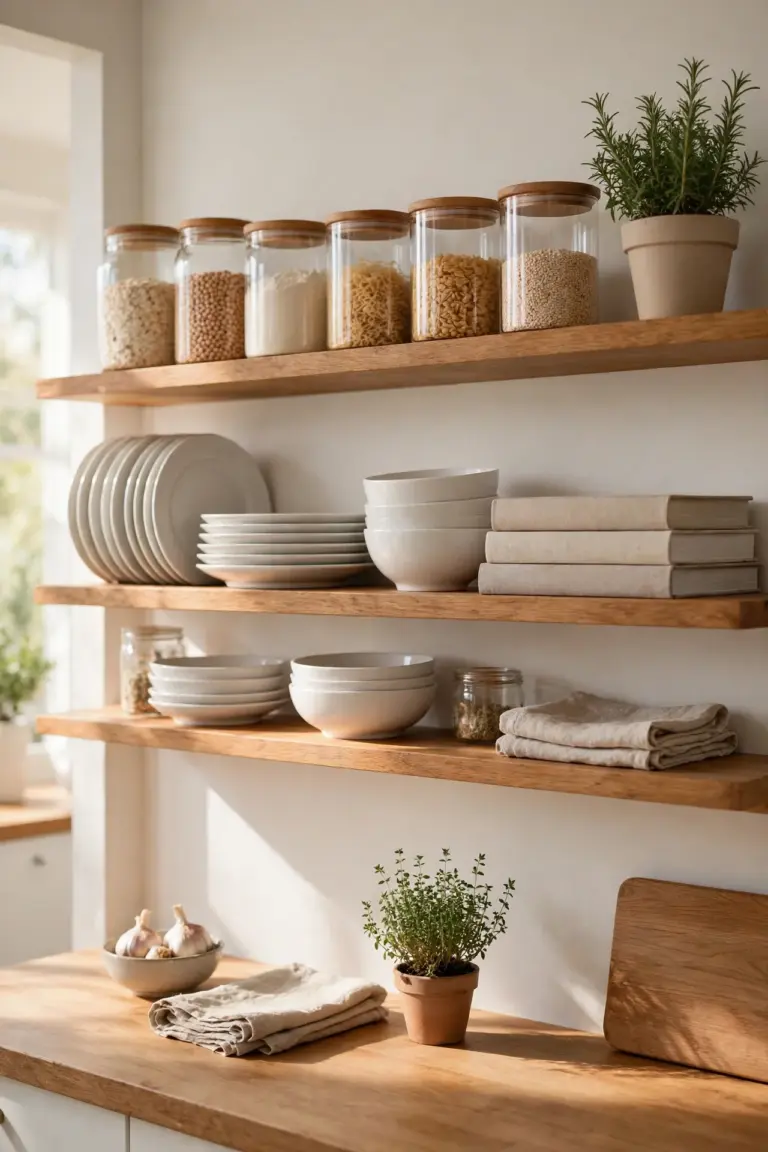
Half open bags of rice, flour, and pasta spill, stale, and hide inside dark cabinets. Clear jars fix all three problems at once because you see the contents, the amount left, and the freshness at a glance. Shelves also look calmer when packaging stops shouting in ten different colors.
Pick jars with wide mouths and lids that seal tightly, then size them to the foods you buy most. Fill tall jars with pasta and cereal, medium ones with rice and lentils, and small ones with nuts and seeds. Add plain labels with the name and the month you filled each jar.
Bakers and families who cook from scratch suit jar storage best because ingredients move fast and stay fresh. One home baker lined one shelf with eight matching jars and wrote her shopping list just by glancing at the levels. Pantry moths also lost interest once every bag left the cabinet.
Buying jars before measuring shelves wastes money and creates new clutter. Tall jars collide with the shelf above and end up exiled to the counter. Measure first, buy a few jars at a time, and keep one consistent shape so the jars line up without wasted gaps.
Wall Rail with Hooks for Pans and Tools
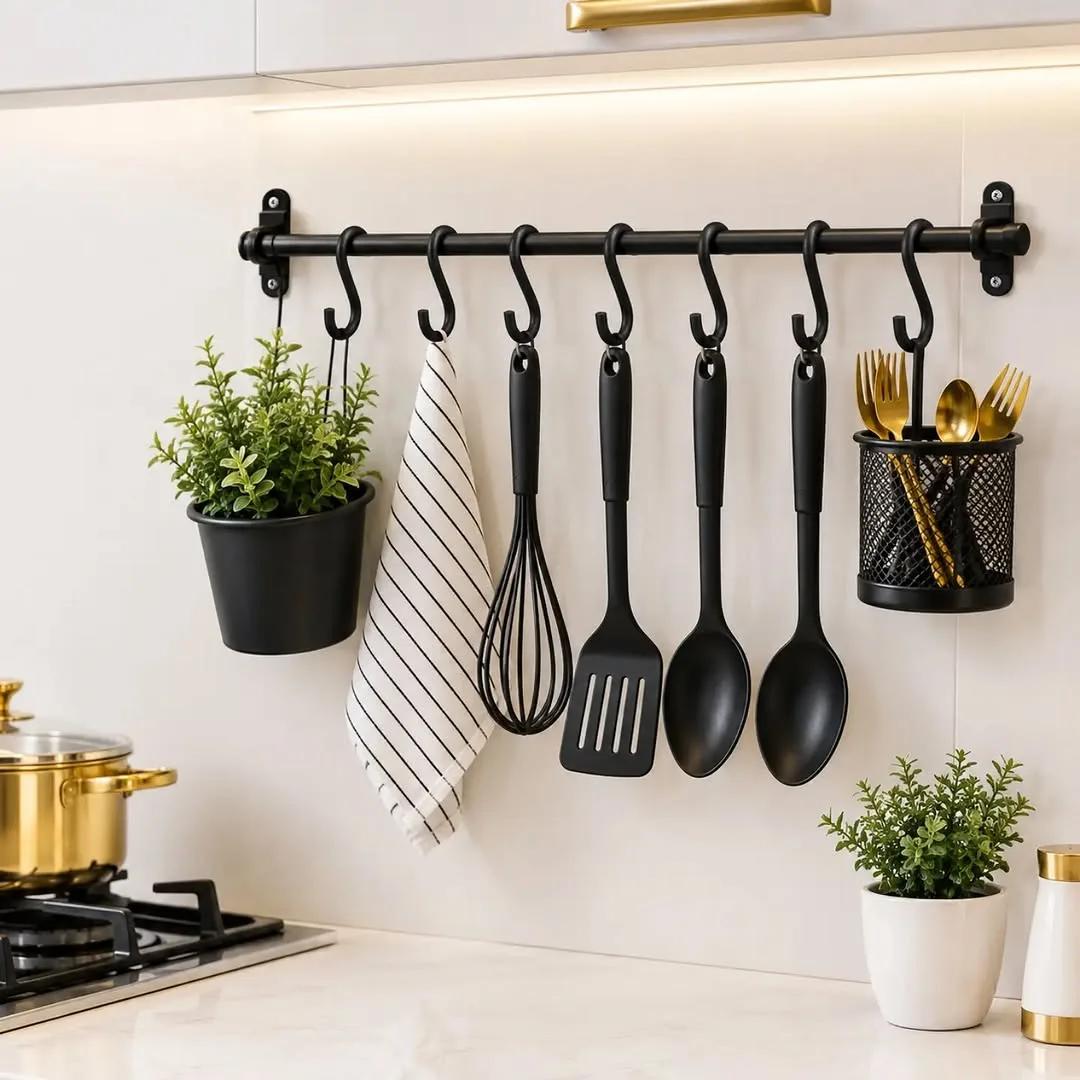
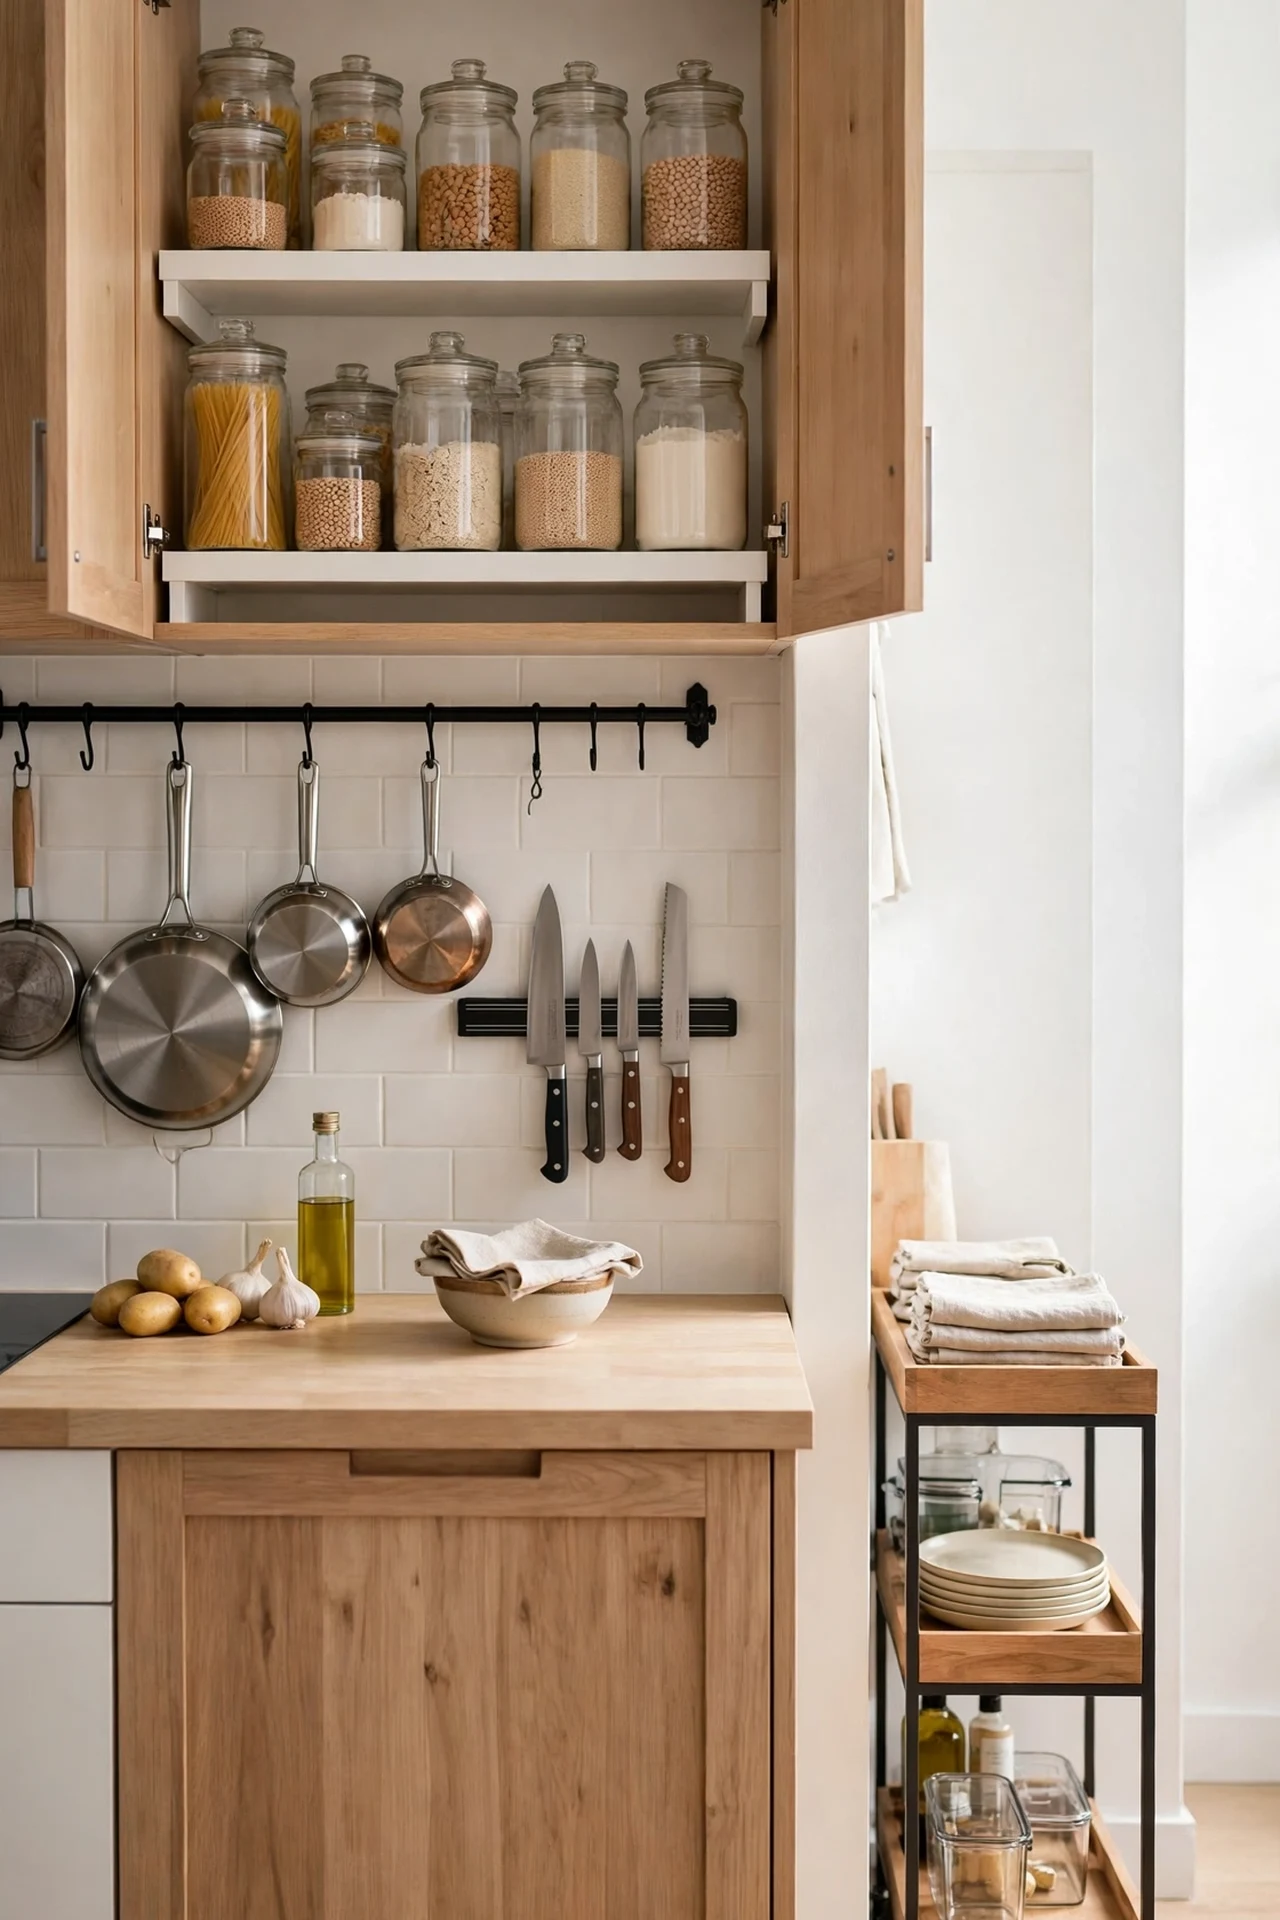
Walls hold serious storage in a small kitchen, yet most cooks leave them bare. One sturdy rail with hooks lifts pans, ladles, and scissors off the counter and out of drawers. Daily tools hang within reach of the stove, and cabinet space opens up for quieter items.
Mount the rail into wall studs or solid plugs, never into bare plaster alone, and hang it at a height your hand reaches without stretching. Space hooks evenly, heaviest pans in the middle, light tools at the ends. Two short rails often work better than one long rail in narrow kitchens.
Daily cooks who use the same five tools suit rail storage best because nothing needs hunting down mid recipe. One cook hung his pans beside the stove and freed an entire cabinet for baking trays. Guests kept saying the kitchen looked like a place where real cooking happened.
Overloading a rail makes it sag and turns reaching for one pan into a clattering event. Thin rails bend under cast iron, and hooks packed too tight scratch pan surfaces. Hang fewer pieces than the rail allows, keep cast iron in the cabinet, and check the fixings every few months.
Drying Rack That Sits over the Sink
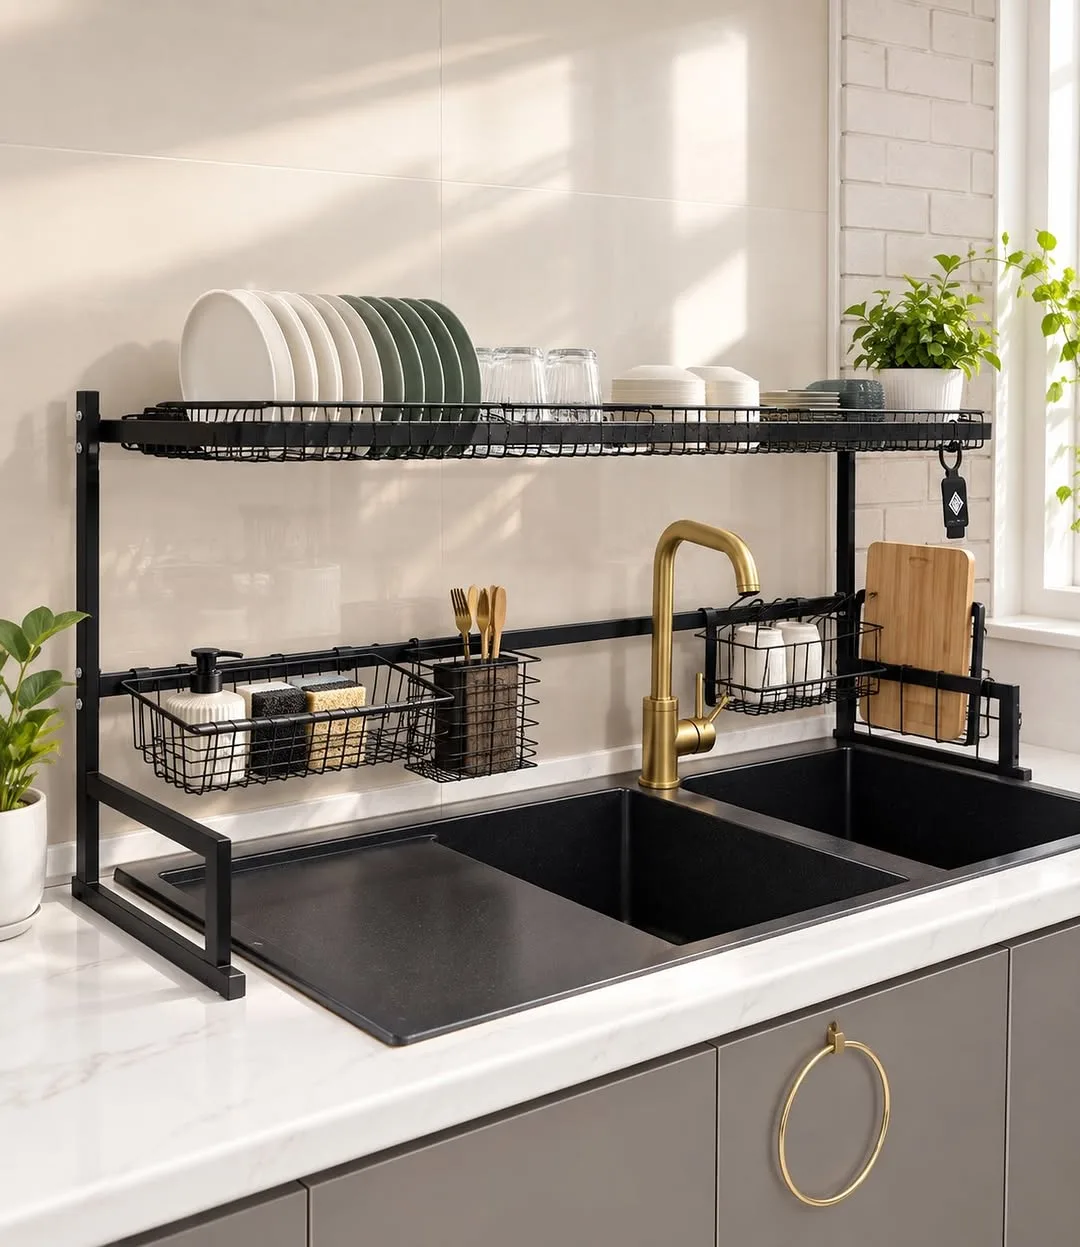
Dish racks eat the counter space small kitchens can least afford. One rack that spans the sink returns that whole patch of counter to food prep. Dishes drip straight into the basin, counters stay dry, and washing up stops spreading across the room.
Look for a rack with adjustable length or one sized to your sink, with rails spaced for plates, bowls, and cutting boards. Stainless steel and coated metal resist rust best in daily steam. Some racks add a small shelf above for cups and a holder for the dish brush.
Singles, couples, and anyone washing small loads by hand suit sink racks best. One cook in a studio kitchen placed her rack over the sink and gained room for a full chopping board beside it. Meal prep stopped feeling like a juggling act with wet plates at every elbow. Weeknight dinners stopped feeling like a squeeze, and washing up lost half its usual counter drama.
Leaving dishes parked on the rack all week turns a smart tool into slow clutter. The rack works when it stays a drying zone, not a cupboard. Put dry dishes away each morning, wipe the rails weekly, and keep sponges out of the dish area so smells stay away.
Magnetic Knife Strip on the Wall
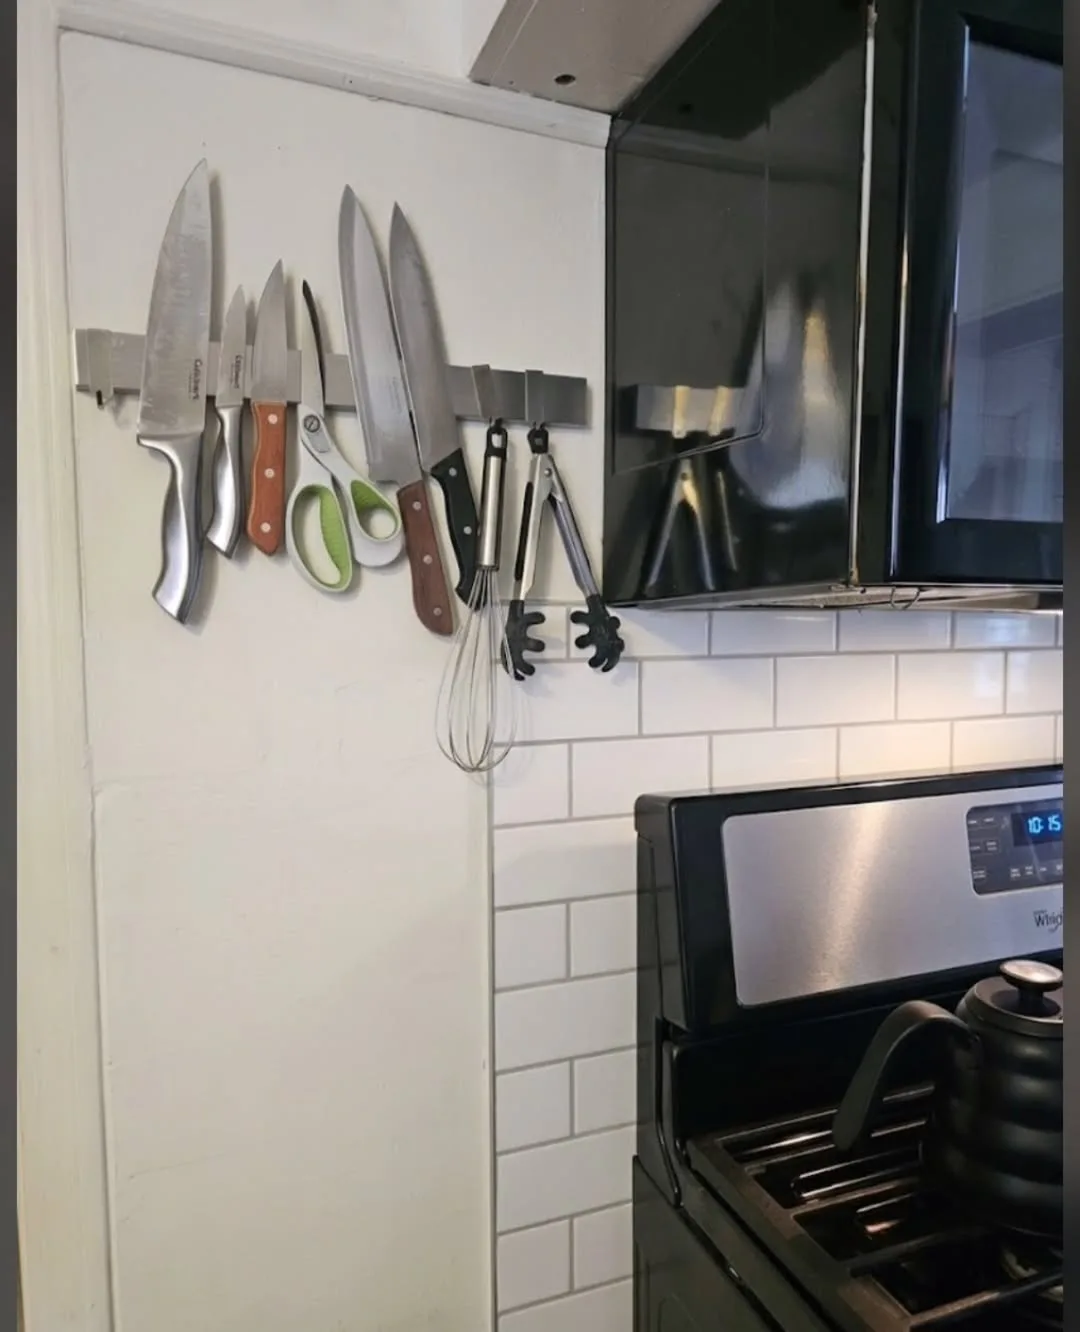
Knife blocks claim a wide patch of counter and hide blade sizes behind wood slots. One magnetic strip on the wall holds every blade flat, visible, and easy to grab. Wall storage like this ranks high among small kitchen organization ideas because it costs little and frees two kinds of space at once.
Fix the strip to studs or strong wall plugs at chest height, away from the sink splash zone. Slide knives on blade first with the sharp edge facing up, and space them so handles never overlap. Keep the strip out of reach of small children, well above their stretching height.
Serious home cooks with a growing knife collection suit wall strips best because every blade stays in view. One cook retired his bulky block, lined six knives on a strip beside the stove, and used the freed counter corner for a fruit bowl. Chopping finally had elbow room.
Dragging blades sideways across the magnet dulls edges and can chip fine tips. Lift each knife straight off the strip and place it back gently. Crowding knives too close together also invites knuckle scrapes, so leave a finger width of space between every handle.
Tiered Spice Storage You Can See at a Glance
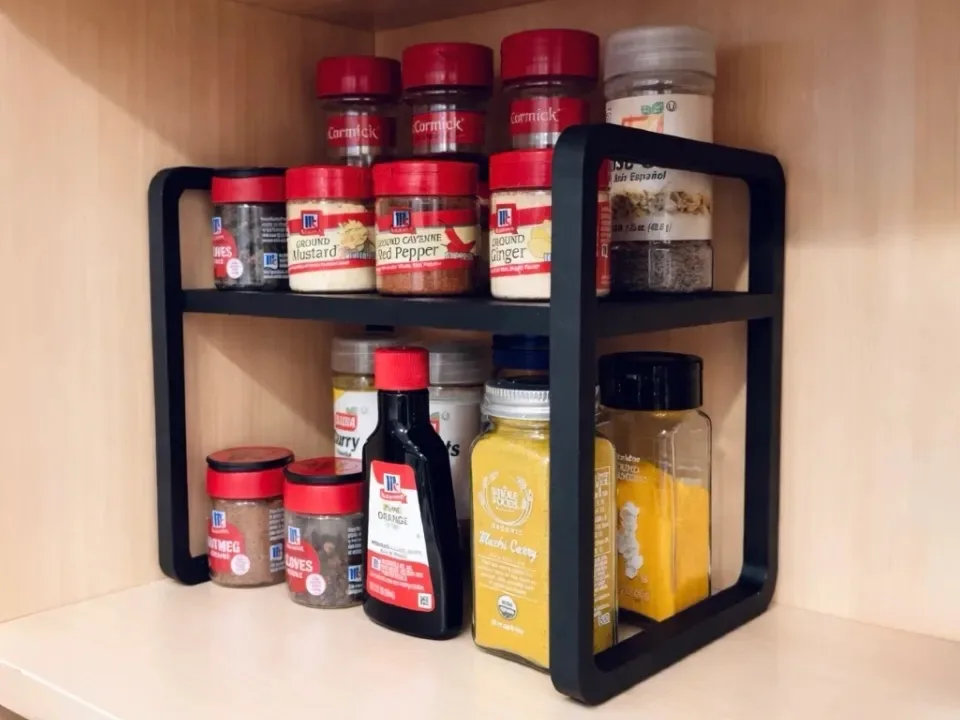
Spices vanish in deep cabinets, and cooks buy duplicates while full jars hide at the back. Tiered storage raises the back rows so every label shows at once. Cooking gets faster and shopping lists get shorter when your whole collection fits in one glance.
Use a stepped riser inside a cabinet, a tiered insert inside a deep drawer, or a narrow rack on the inside of a door. Group jars by cuisine or by how often you cook with them. Matching small jars with names written on the lids make drawer storage even easier to read.
Keen cooks and anyone building a spice collection on a budget suit tiered storage well. One cook moved fourteen jars onto one stepped riser and found three duplicates she had bought by mistake. Her next grocery trip skipped the spice aisle completely for the first time in months.
Storing spices above the stove looks handy but slowly ruins them. Heat and steam fade flavor fast, and jars handled with wet cooking hands grow sticky and grimy. Keep spices in a cool cabinet or drawer near your prep area instead, close to the action but safe from the steam.
Under Shelf Baskets That Add a Second Layer
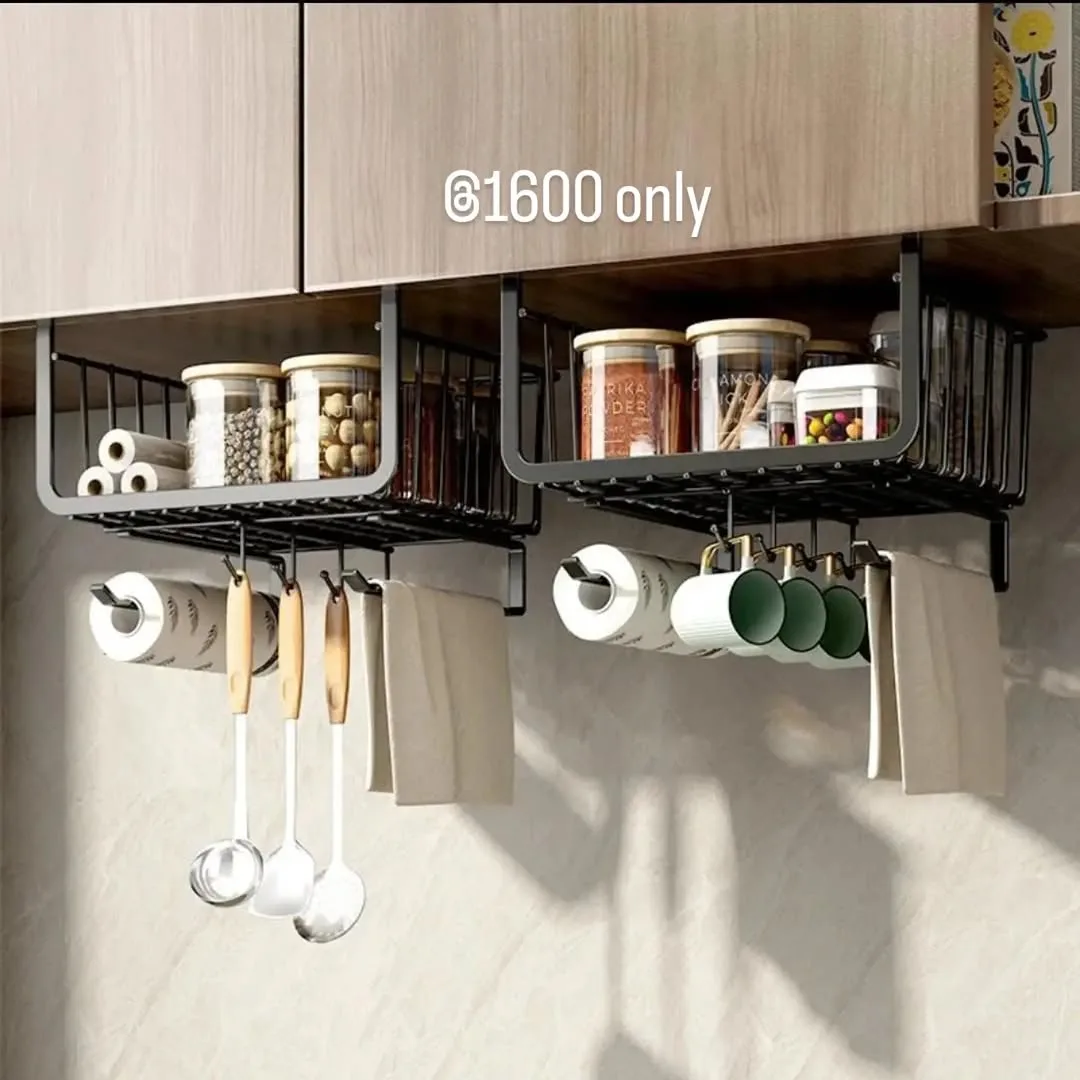
Baskets that hook over a shelf edge create storage where none existed. Each basket adds a second layer inside tall cabinets without tools, drilling, or new furniture. Light items like wraps, napkins, and snack bars finally get a home that uses the empty air under a shelf.
Slide the basket arms over the shelf, check the fit feels snug, and load it with light goods only. One basket per cabinet keeps the look calm, while two side by side work in wide cabinets. Measure shelf thickness before ordering, because basket arms vary more than sellers admit.
Families with lunch boxes, wraps, and snack supplies suit under shelf baskets best because small packets multiply fast. One parent parked all the cling wrap, foil, and sandwich bags in one basket and ended the morning scramble through three drawers. School lunches started leaving the house on time.
Loading these baskets with heavy tins bends the arms and can pull the whole basket down. Weight also warps thin cabinet shelves over time. Keep baskets for light goods, rest heavy cans on solid shelves, and shift the basket if the shelf edge shows any strain.
Slim Rolling Cart for Gaps and Corners
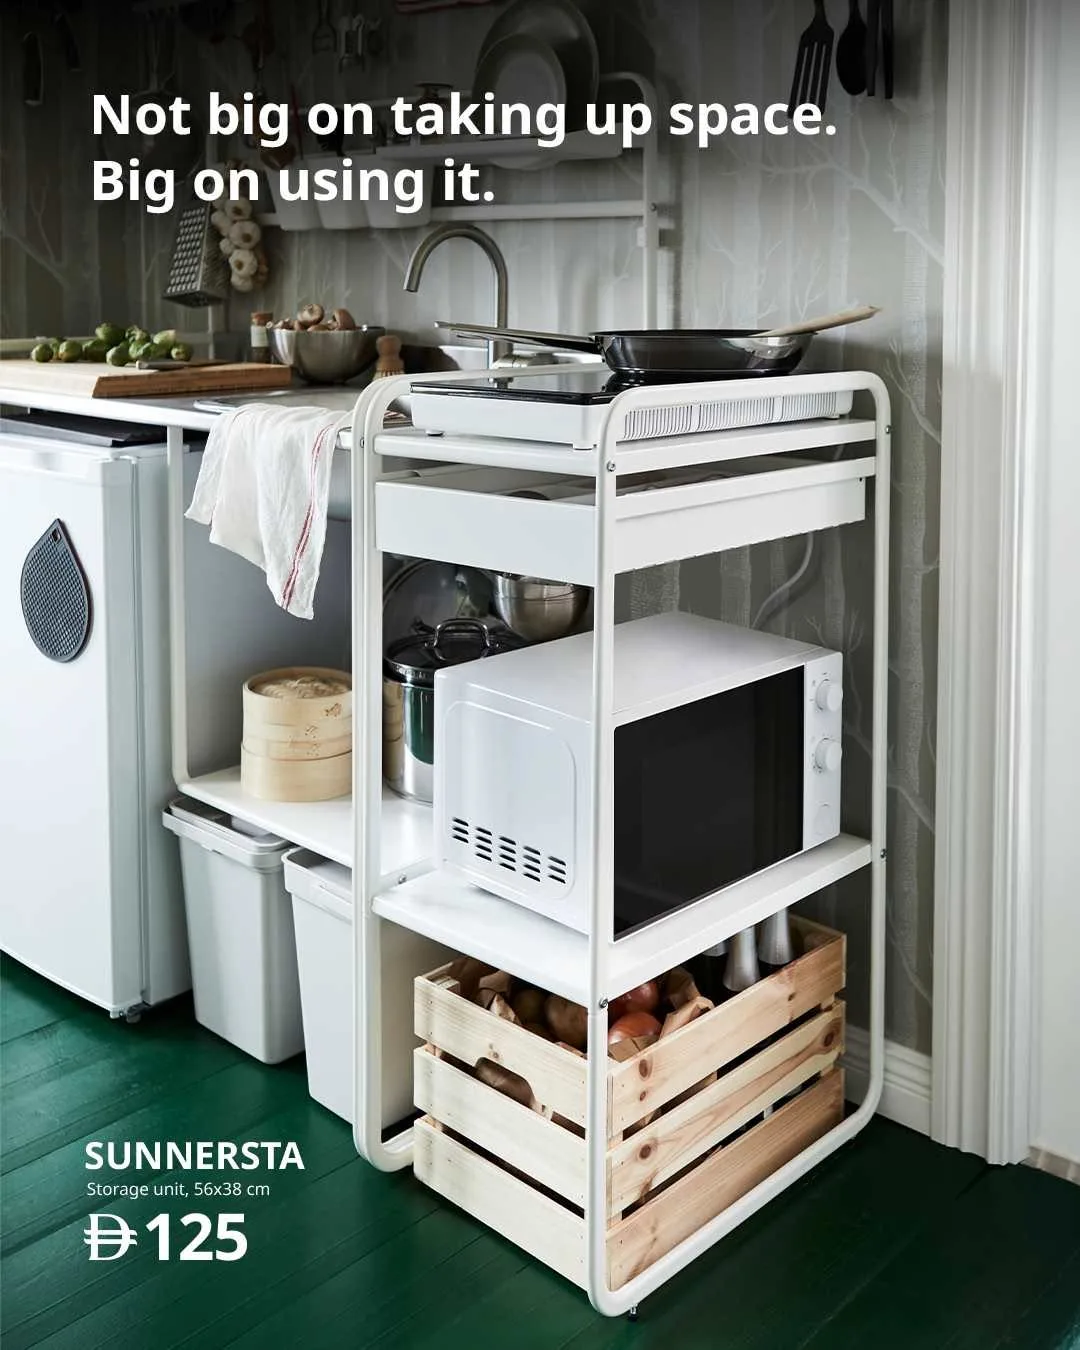
Narrow gaps beside the stove or fridge waste more space than most people realize. One slim rolling cart turns that dead strip into storage for oils, sauces, and cleaning bottles. Wheels let you pull the whole store out, take one bottle, and slide everything back in seconds.
Pick a cart with three tiers, smooth wheels, and a height just below your counter so it tucks away fully. Keep cooking oils on the top tier near the stove, refills in the middle, and cleaning supplies at the bottom. Metal carts wipe clean fastest after inevitable sauce drips.
Cooks with awkward layouts and no pantry suit rolling carts best because the cart brings the pantry to the gap. One cook parked oils, vinegar, and hot sauce on a cart beside her stove and stopped crossing the kitchen mid recipe. Sauces that once hid in three cabinets now live in one place.
Parking the cart in a walkway trades storage for bruised hips and constant annoyance. Carts belong in gaps, not in traffic. Measure the gap before buying, test the slide path once, and keep handles or tall bottles from blocking the slide back into place.
Racks on the Inside of Cabinet Doors
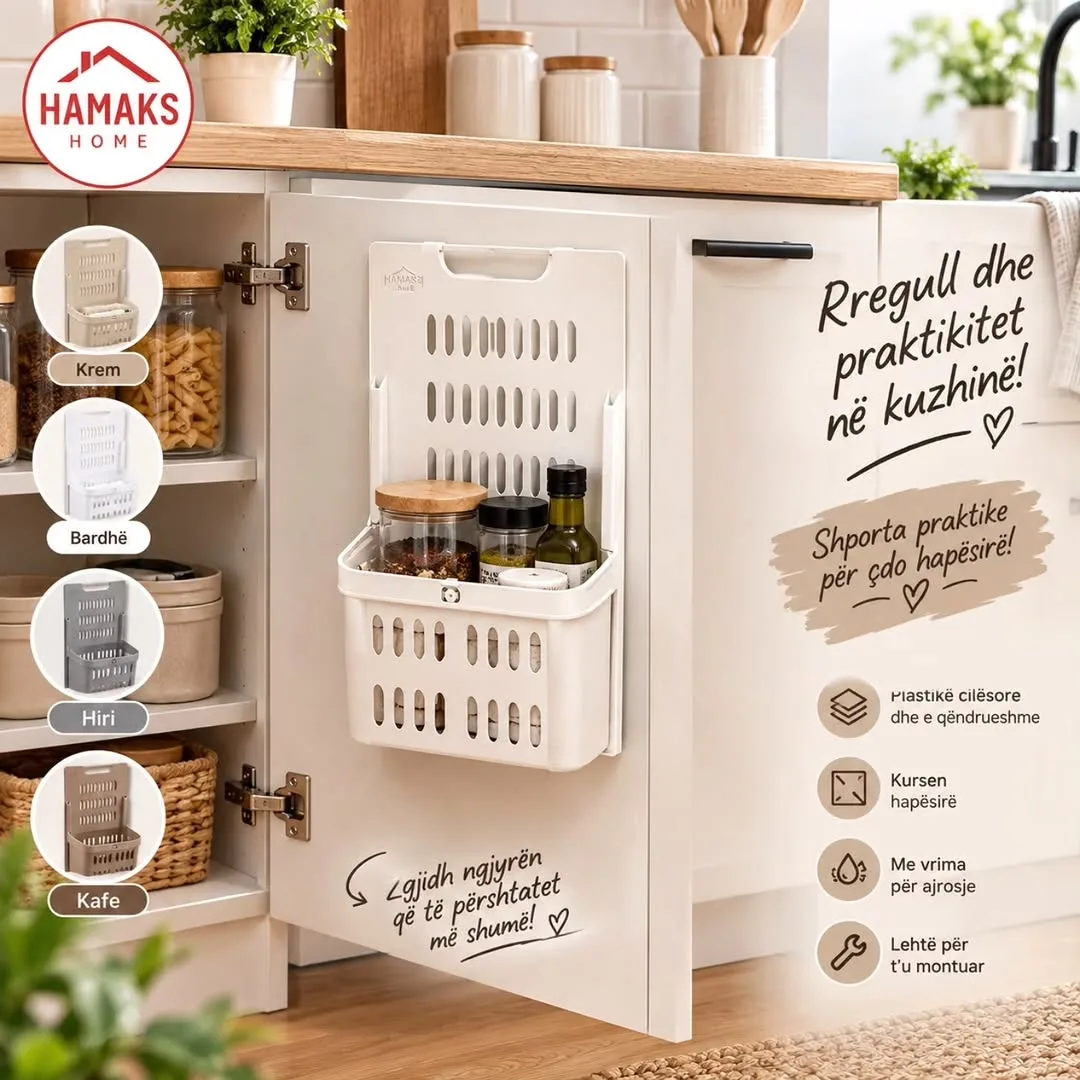
Doors offer flat storage that most small kitchens ignore completely. Slim racks on the inside face of a cabinet door hold lids, wraps, spice jars, or cleaning cloths in one tidy layer. Opening the door brings the whole set to your hand, and the cabinet interior stays free for bigger items.
Fit racks with screws where the door frame is thick, or choose over door hooks where drilling feels wrong. Check closing clearance with the shelves inside before fixing anything in place. Keep the heaviest items, like spare lids, on the lowest rack so the hinges carry less strain.
Door racks count among the cheapest small kitchen organization ideas because one small rack can clear a whole junk drawer. One cook moved wraps, foil, and baking paper onto a door rack and turned the freed drawer into proper cutlery storage. Her busiest drawer finally closed without a fight.
Deep racks cause the most common failure because items crash into the shelves every time the door closes. Test the door swing with the rack loaded before you commit. Slim profiles, soft goods up top, and nothing sticking past the door frame keep the system quiet and kind to hinges.
Nesting Bowls and Stackable Food Containers
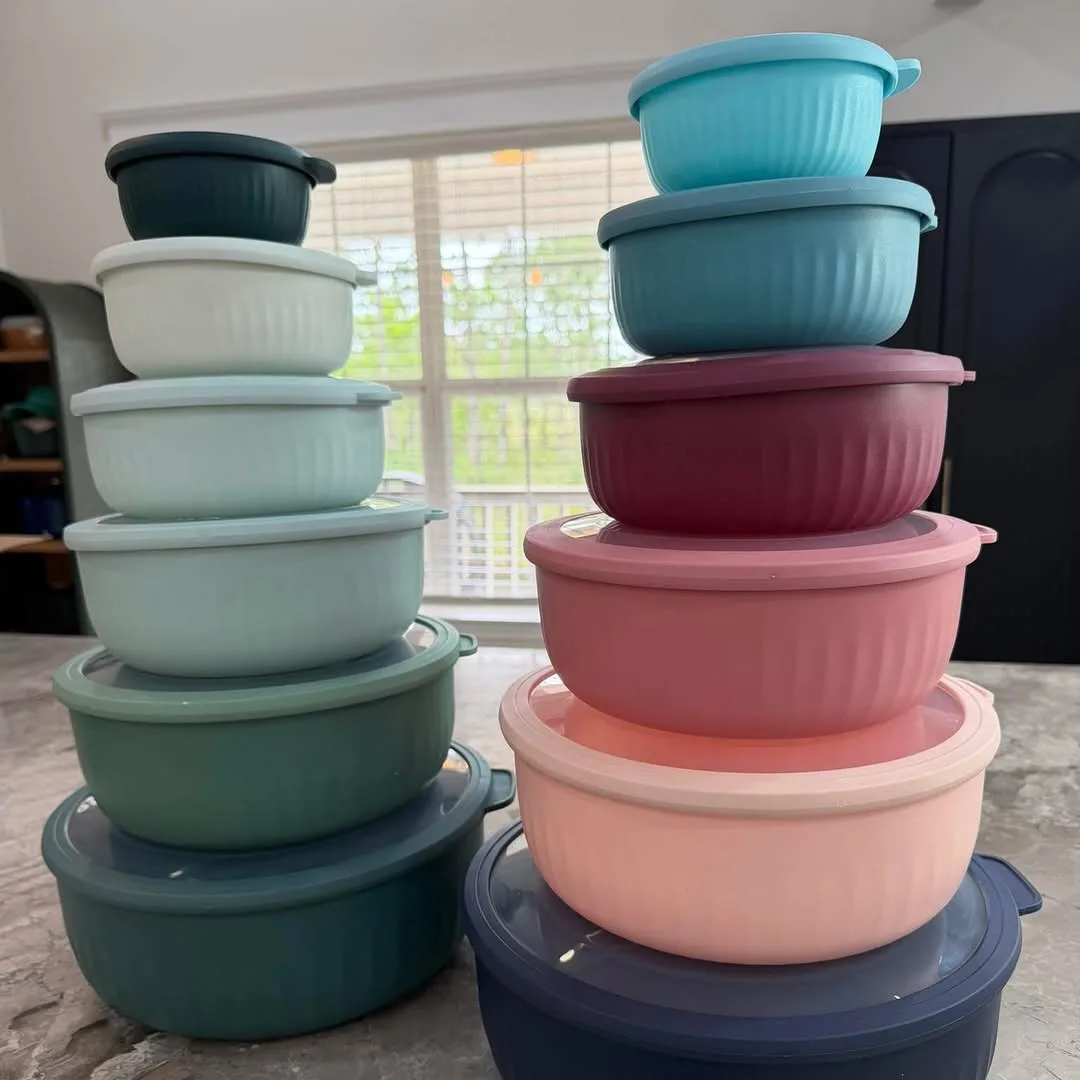
Mismatched bowls and stray containers devour cabinet space in most small kitchens. Nesting sets shrink a whole collection into the footprint of the largest bowl. Stackable containers with matching lids do the same for leftovers, and fridge shelves stop looking like a puzzle.
Keep one set of mixing bowls that nest fully, one set of containers that share a single lid size, and let the rest go. Store lids upright in a slim holder or a small box so they stop sliding into corners. Square containers pack tighter than round ones on fridge shelves.
Meal preppers and anyone cooking for the week suit stackable sets best because uniform boxes stack safely and pack fast. One cook replaced nine odd containers with six matching square ones and gained half a cabinet shelf. Lunch packing on Sunday nights turned into a ten minute job.
Hoarding every takeaway tub and yogurt pot undoes the whole system within months. Plastic piles grow faster than any cabinet can hold. Set a strict limit on spare tubs, recycle the overflow, and store lids with their boxes so pairs never split up again.
Turntable That Tames Deep Corner Cabinets
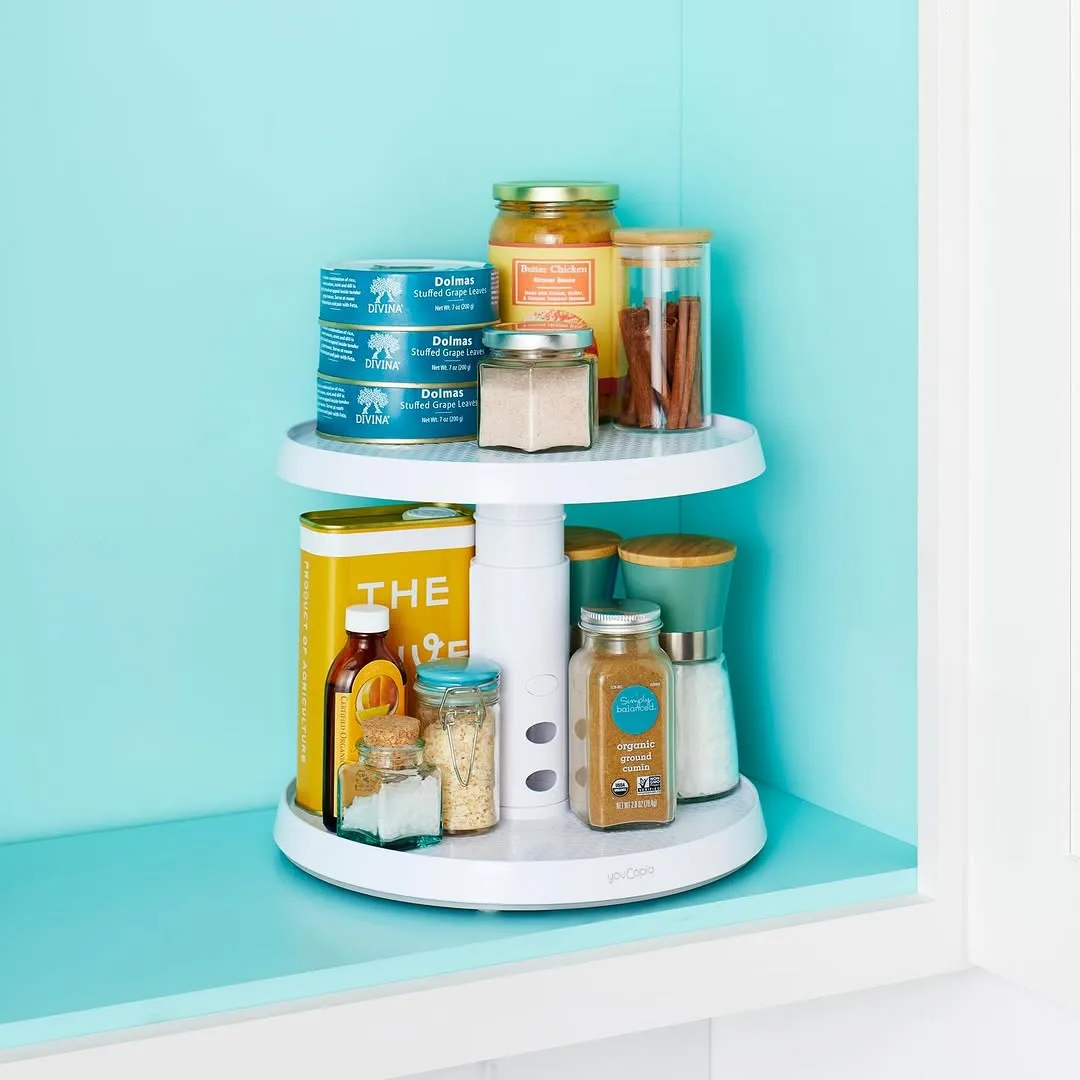
Corner cabinets swallow bottles and jars into a dark zone nobody wants to enter. One turntable brings the back row to the front with a single spin. Sauces, oils, and small jars stop expiring in hiding because you finally see them every time you open the door.
Place the turntable on the cabinet floor or the middle shelf and leave a small gap around the edge so it spins freely. Group bottles by use, cooking oils together, baking goods together, and keep tall items in the center. Wide turntables suit deep corners, while two small ones suit split shelves. One gentle spin should show you everything stored on it.
Households with deep cabinets and growing sauce collections suit a turntable well. One cook spun out a bottle of sauce she had already replaced twice, still sealed and months old. After fitting the turntable, her repeat buying stopped and the corner cabinet became her favorite shelf.
Spinning a loaded turntable too fast flings bottles into the door and each other. Heavy glass near the edge also makes the disc wobble under weight. Turn slowly, keep the heaviest bottles near the center, and choose a turntable with a raised rim for extra safety.
Vertical Storage for Trays and Cutting Boards
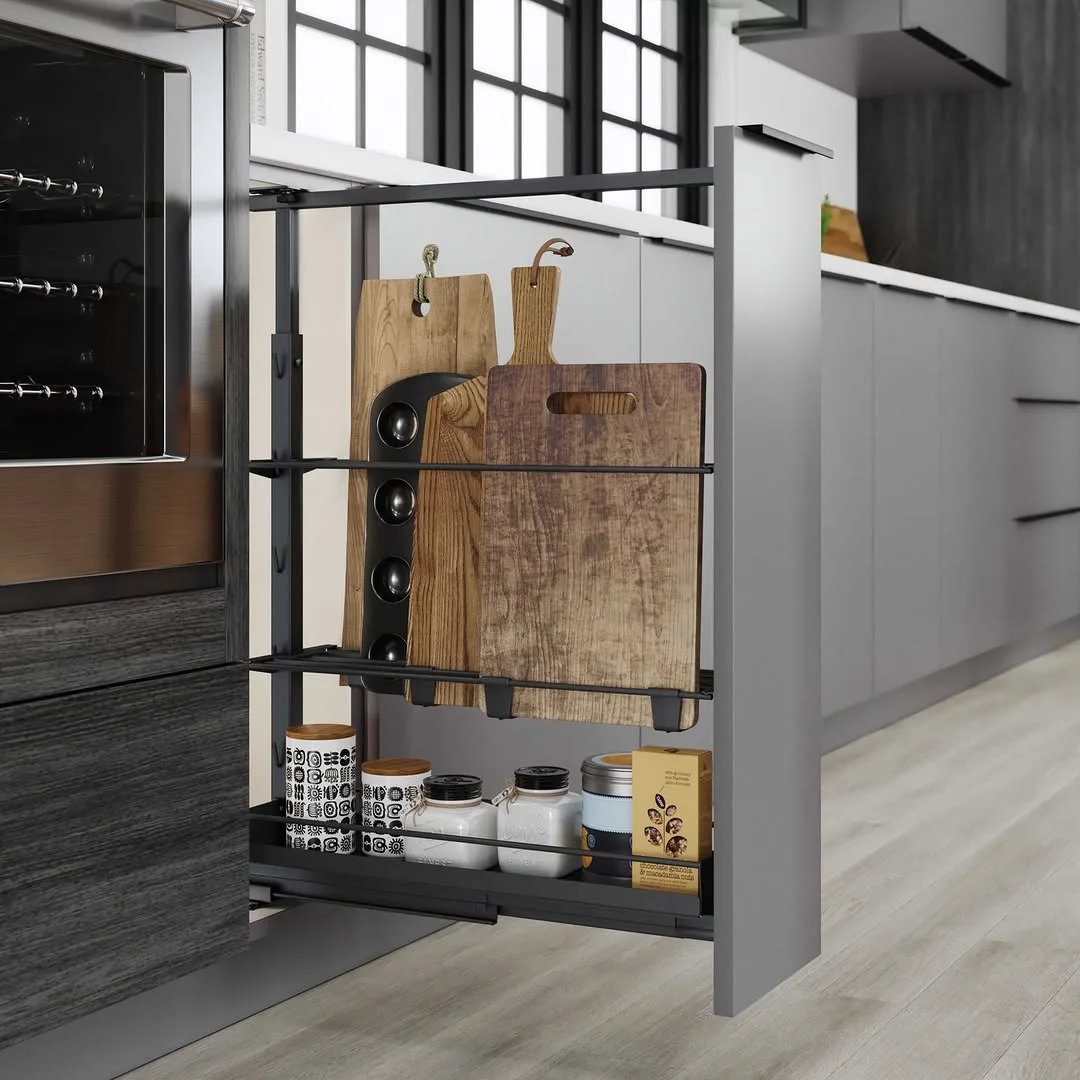
Flat items stored flat create the worst pile in the kitchen. Trays, boards, and baking sheets bury each other, and pulling one out drags three more along. Standing them upright in a divider ends the avalanche and shows every piece at once.
Stand a simple file style divider or a tension rod setup inside one cabinet or a deep drawer. Sort boards by size, heaviest against the cabinet wall, and keep baking sheets in the same upright row. Leave the most used board at the front so daily cooking needs no shuffling.
Frequent bakers and sheet pan dinner fans suit vertical storage best because their boards and trays move daily. One baker stood five trays and three boards in one narrow cabinet and stopped stacking them on top of the fridge. Cleanup stopped ending with a crash of metal.
Cramming too many pieces into one divider scratches surfaces and makes boards stick together when damp. Wooden boards stored wet also warp and crack over time. Dry everything fully before it goes back, and give thick boards their own slot instead of forcing them into tight gaps.
Mug Hooks Under Cabinets
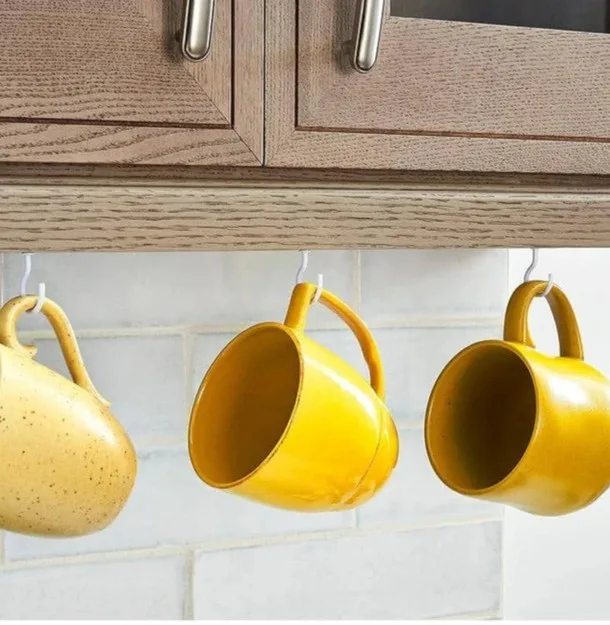
Mugs eat shelf space faster than almost anything else in a small kitchen. Hooks screwed under a cabinet move the whole collection into the empty air above the counter. Morning coffee speeds up too, because your favorite mug hangs right beside the kettle.
Space hooks evenly along the underside of one cabinet, close to the coffee or tea station. Use hooks rated for the weight of your heaviest mug, and check the cabinet base is thick enough for the screws. Six hooks suit most households, and matching mugs look calm in a row.
Coffee and tea drinkers suit mug hooks best because daily mugs deserve daily reach. One couple hung eight mugs under a cabinet and freed an entire shelf for glasses that had lived on the counter. Guests now help themselves to mugs without opening a single door.
Hanging your best mugs above a steamy kettle spot slowly fades glazes and fills cups with dust between uses. Steam also loosens some adhesive hooks until a mug drops. Choose a dry stretch of cabinet, prefer screws over sticky pads, and keep delicate cups inside the cabinet instead.
One in One Out Rule with a Donation Box
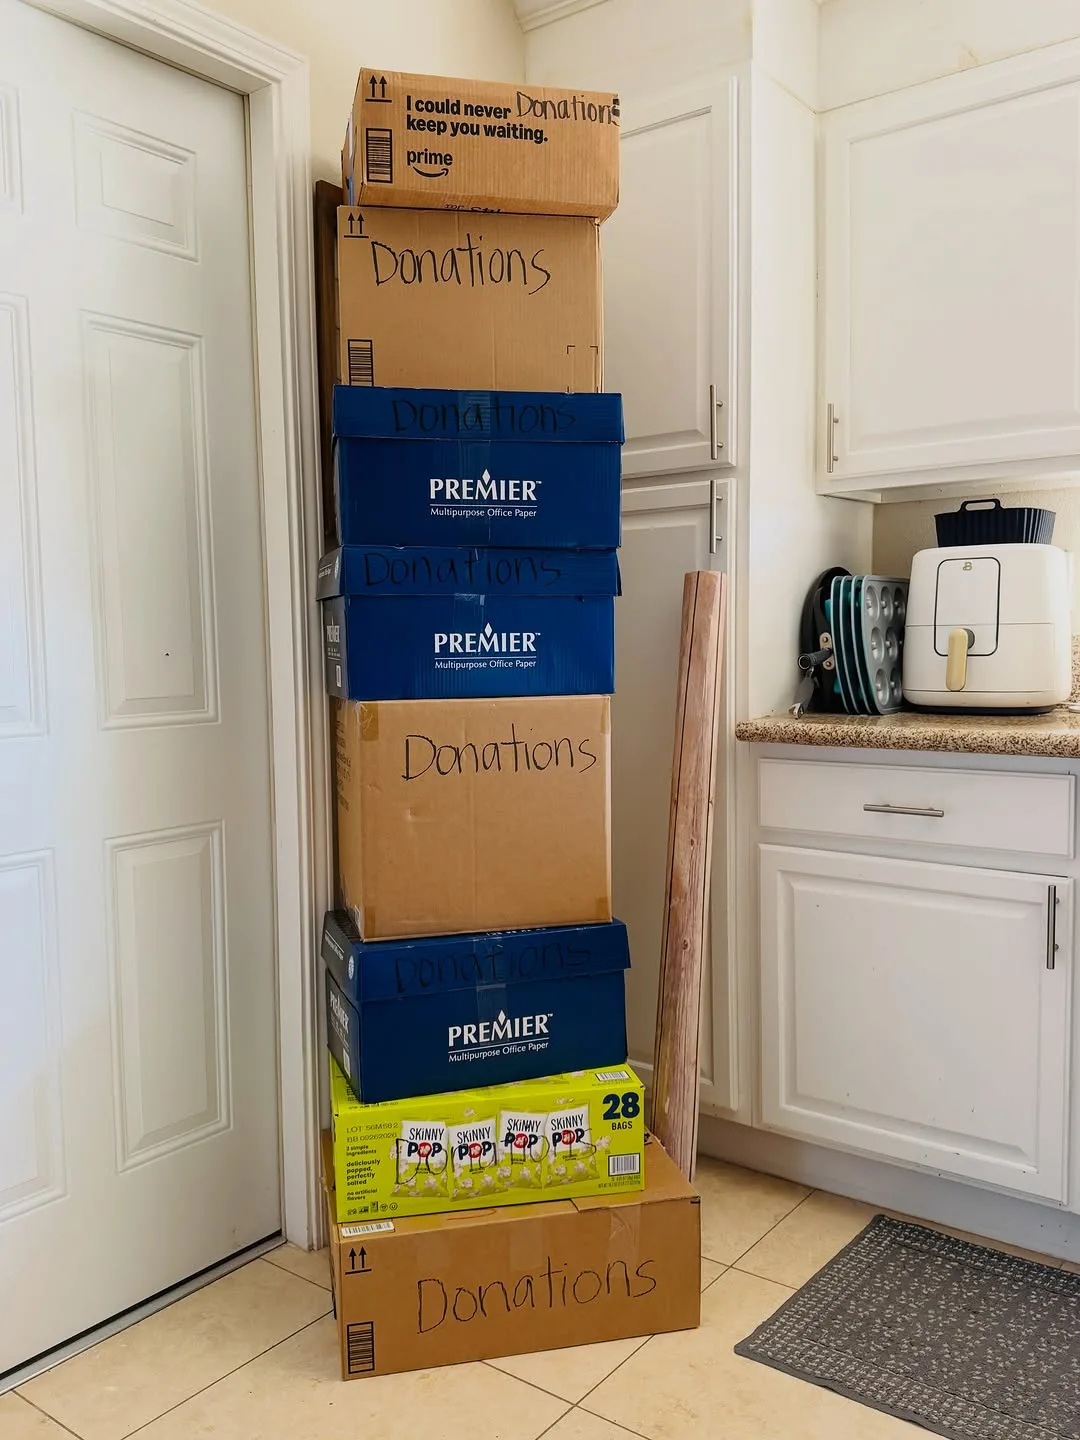
Systems fail when the total amount of stuff keeps growing past what the room can hold. One simple rule protects every other idea in this guide: each new item that enters the kitchen pushes one old item out. Cabinets stay honest, and shopping becomes a decision instead of a habit.
Set one small donation box in a closet or under the sink and drop the outgoing item in the moment its replacement arrives. Duplicate tools, tired pans, and gadgets used once all belong in the box. When the box fills, it leaves the house that same week.
Growing families and keen cooks who receive kitchen gifts suit this rule best because their collections expand every year. One cook cleared fourteen rarely used tools in a single month of honest swaps. Her drawers finally closed flat, and cooking felt lighter in a way guests noticed.
Rules collapse when the donation box never leaves the house and becomes storage with a kind name. Sentimental spares also pile up when every item claims a memory. Photograph keepsakes, pass family pieces to relatives who will use them, and let the box leave on schedule.
Common Mistakes to Avoid
Organizing before sorting is the mistake that wastes the most money. People buy trays, racks, and jars for items they should have let go of weeks earlier. Empty one zone fully, sort hard, and measure the space before a single organizer enters the house.
Buying a full matching set of organizers in one go locks you into guesses about sizes and habits. One wrong measurement can strand a whole set on a shelf. Start with two or three pieces, live with them for a month, and let real cooking show you what still hurts.
Putting daily tools far from where you use them quietly undoes every other improvement. Knives beside the sink, spices across the room, and mugs away from the kettle add hundreds of small trips each week. Walk through one normal meal in your head and move the busiest items closer.
Counters slowly collect appliances, post, and gadgets until prep space shrinks to one small square. Each item on the counter must earn its place by working every day. Store the rest in cabinets, and guard the clear space like it is the most valuable shelf you own. Treat clear counters as finished work, not as empty space waiting to be filled.
Budget Friendly Small Kitchen Organization Ideas
Sorting costs nothing and saves the most, so begin there before any spending. Empty, clean, and refill one cabinet at a time, letting go of duplicates as you go. Most kitchens gain a shelf or two from sorting alone, before a single new item arrives.
Smart small kitchen organization ideas repeat cheap basics instead of chasing novelty. Jars from your own recycling, sturdy boxes, and simple hooks solve most storage problems for very little money. One consistent style across the room looks calmer than mixed sets bought in a rush.
Secondhand shops and market stalls sell trays, baskets, and jars for a fraction of shop prices. Bring your measurements and a tape, and check pieces for cracks, rust, and working lids. Buying slowly, one useful piece at a time, protects both the budget and the fit.
Free storage hides in plain sight around most homes. Sturdy shoe boxes, gift boxes, and spare baskets from other rooms can divide drawers and line shelves today. Spend money only where a bought piece clearly beats a borrowed one, like strong hooks or a turntable that spins true.
Tips for Organizing a Small Kitchen
Work in zones, one small area at a time, and finish each zone fully before moving on. Half finished projects spread clutter across every surface and drain motivation fast. One calm drawer today beats a whole chaotic kitchen attempted in one exhausting weekend.
Build your small kitchen organization ideas around cooking zones: prep tools near the board, cooking tools near the stove, and washing supplies near the sink. Zones cut walking, speed up every meal, and make it obvious when an item has wandered into the wrong home.
Label shelves and jars even when you think you will remember. Labels end the guessing for everyone else in the house and keep systems alive after busy weeks. Plain tape and a marker work fine, and clear labels help guests and kids put things back correctly. New items get a label the day they arrive, before they earn a permanent spot.
Review one shelf each month and pull out anything that has not earned its space since the last check. Tastes change, gadgets disappoint, and collections creep. Small regular reviews protect the room far better than one giant clear out each year.
Guard the counter like prime land and give every surface item a weekly review. If a gadget rests more than it works, it moves into a cabinet or out of the house. Clear counters make even tiny kitchens feel calm and ready.
FAQ
Where Should I Start Organizing a Small Kitchen?
Start with the drawer or cabinet you open most, because early wins there build momentum for the rest. Empty it fully, sort honestly, and give daily items the front spots. One finished zone proves the system works and shows you exactly how to handle the next one.
How Can I Add Storage Without New Cabinets?
Walls, doors, and the air under shelves all hold storage that costs little and changes nothing about the room itself. Rails, door racks, mug hooks, and under shelf baskets can add the equal of one extra cabinet across a weekend. Add them one at a time and check the fit before fixing anything.
What Should I Do with Items I Rarely Use?
Seasonal and rarely used items belong in the highest cabinets, a closet, or a labeled box outside the kitchen. Daily space belongs to daily tools. If an item has rested untouched for a full year, pass it to someone who will cook with it gladly.
How Do I Keep a Small Kitchen Organized Long Term?
Habits keep kitchens organized far longer than any organizer can. Put items back in their zone after every meal, run the one in one out rule on new purchases, and review one shelf each month. Small steady effort beats heroic sorting weekends every time.
Which Organizers Are Worth Paying For?
Strong hooks, a smooth turntable, and drawer dividers that fit your true measurements repay their cost every single day. Cheap versions of these three often bend, jam, or wobble within months. Spend where hands touch daily, and save on boxes, baskets, and jars.
How Much Time Does a Full Reorganize Take?
Most small kitchens come together across two or three short sessions rather than one long day. Plan one hour per zone, sort first, and buy organizers only after you see the true piles. Spreading the work keeps decisions sharp and stops good items leaving by mistake.
Conclusion
Small kitchens reward calm systems far more than clever shopping. Clear counters, honest drawers, and tools that live near their work make daily cooking feel easy, and honest small kitchen organization ideas keep that simple order straight. Start where the mess bothers you most, and let each finished zone pull the next one along.
Choose progress over perfection and give every change a week of real cooking before judging it. Systems that survive busy weeknights are the ones worth keeping. Small adjustments, like moving one drawer of tools closer to the stove, often matter more than big purchases.
Share the system with everyone who cooks in the room, because one person storing things in secret spots breaks the calm fast. Labels, zones, and the donation box only work when the whole household plays along. Ten minutes of explaining saves weeks of hunting.
Begin this week with one drawer, one shelf, or one door, and enjoy how quickly the room answers back. Cooking in a kitchen where everything has a home feels lighter from the very first meal. Set your first zone, cook something simple, and notice the difference.